With the world getting more interconnected with the widespread use of the internet, most applications offer some sign-in functionality to save users in-app data to the cloud. Firebase is a mobile backend as a service(MBaaS) that offers tons of functionalities to make implementing authentications and other back-end operations easy and flexible.
In this article, we will be implementing twitter authentication in a flutter app using Firebase authentication.
Prerequisites
- Basic knowledge of the flutter framework and dart language.
- A Firebase account, since this would be used to create our app. You can create an account here.
- A Twitter developer account, which is going to be used to create an app for our application. You can head over here to set up one.
- Burning passion to learn something new🔥🔥.
- A need to add Twitter authentication to your flutter app.
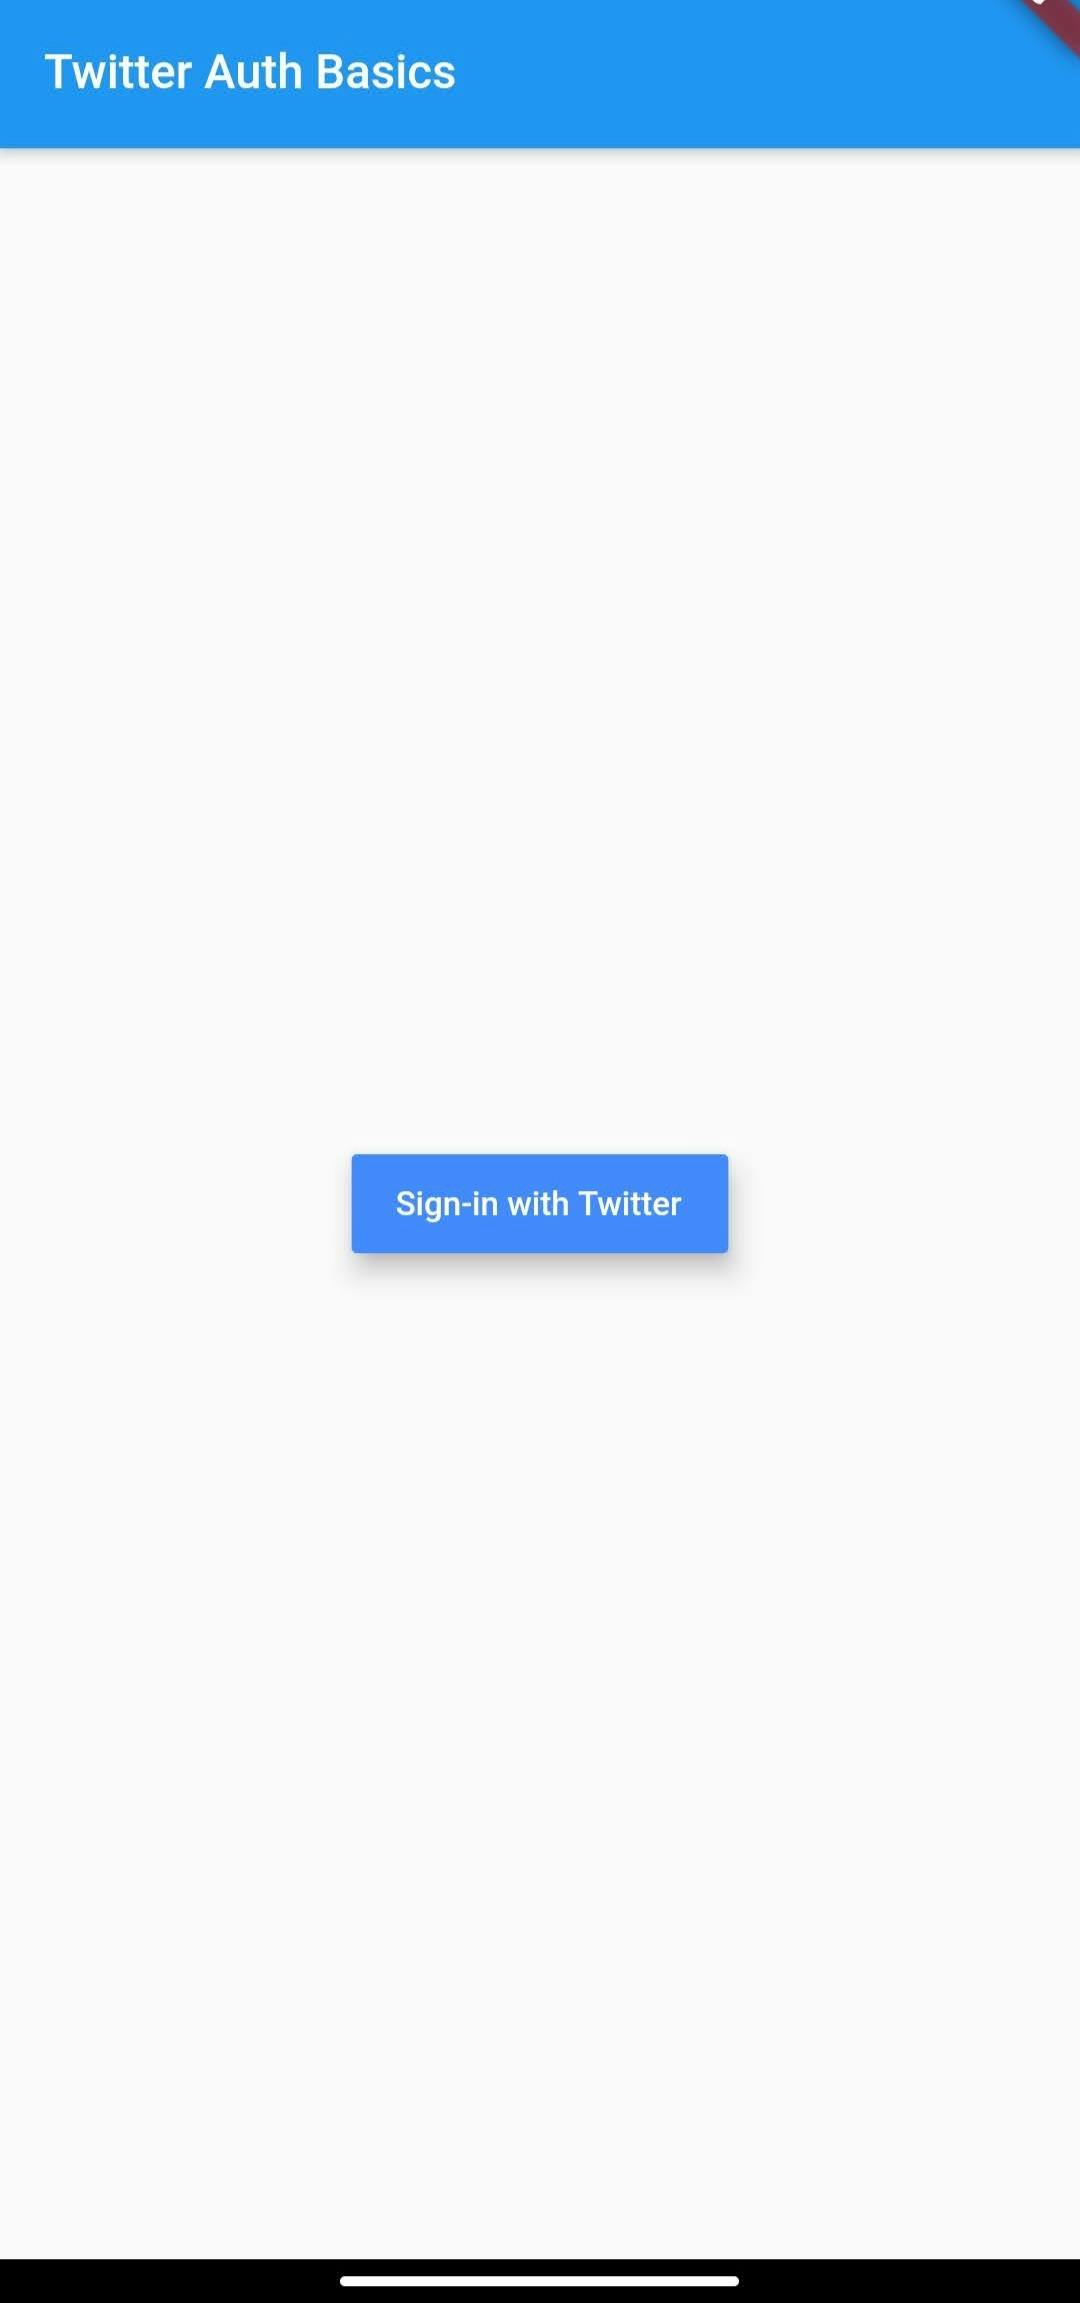
To kick off this article, we'll write a basic page with a button, which the user is supposed to press to sign in to the app using Twitter authentication. Below is the code for the layout of the sign-in screen.
class SignInPage extends StatelessWidget {
    @override
    Widget build(BuildContext context) {
        return Scaffold(
            appBar: AppBar(
               title: Text('Twitter Auth Basics'),
             ),
             body: Center(
               child: RaisedButton(
                 color: Colors.blueAccent,
                 disabledColor: Colors.blueAccent,
                 elevation: 8,
                 onPressed: null,
                 child: Text('Sign-in with Twitter', style: TextStyle(color: Colors.white,),),
               ),
            ),
         );
     }
}
Now we add the required dependencies in the pubspec.yaml file found in the project root, we navigate there and add the following lines to the dependencies.
twitter_login : ^4.0.0
firebase_auth: ^1.0.0
provider: 4.3.2+2
firebase_core: 1.3.0
Make sure you adhere to indenting rules for your pubspec.yaml, now run the flutter get command in the terminal.
About the packages we added to the project, the first is the twitter_login package which would enable signing in to Twitter, the second is the firebase_auth package used for authentication in Firebase. The provider package is used to check changes in user authentication and the Firebase core is used to initialize firebase on the app.
To implement authentication calls, we create a file and name it auth.dart, then fill with the following lines of code
abstract class AuthBase {
    User get currentUser;
    Stream<User> get authStateChanges;
    Future<User> signInWithTwitter();
    Future<void> signOut();
}
class Auth implements AuthBase {
    final _firebaseAuth = FirebaseAuth.instance;
    @override
    Stream<User> get authStateChanges => _firebaseAuth.authStateChanges();
    @override
    User get currentUser => _firebaseAuth.currentUser;
    @override
    Future<User> signInWithTwitter() async {
      final twitterLogin = TwitterLogin(
        apiKey: "",
        apiSecretKey: "",
        redirectURI: "",
      );
      final authResult = await twitterLogin.login();
      switch (authResult.status) {
          case TwitterLoginStatus.loggedIn:
              final userCredential = await _firebaseAuth.signInWithCredential(
              TwitterAuthProvider.credential(
              accessToken: authResult.authToken,
              secret: authResult.authTokenSecret),
              );
              return userCredential.user;
          case TwitterLoginStatus.cancelledByUser:
              throw FirebaseAuthException(
                code: 'ERROR_ABORTED_BY_USER',
                message: authResult.errorMessage,
              );
              break;
          case TwitterLoginStatus.error:
              throw FirebaseAuthException(
                code: 'ERROR_TWITTER_LOGIN_FAILED',
                message: authResult.errorMessage,
              );
              break;
          default:
              throw UnimplementedError();
      }
    }
    @override
    Future<void> signOut() async {
        await _firebaseAuth.signOut();
    }
}
Ensure the appropriate packages are imported.
Now let's go over the content of our auth.dart file. Firstly, we create an abstract class whose methods are implemented by another class, hiding the implementation details(equivalent to interfaces in other OOP languages). For the Auth class, we implement the methods. authStateChanges is a stream that notifies us of any changes to the user object(this is good for signing in/out since it returns null when a user is signed out and a user object when signed in), currentUser gets our current user. In the signInWithTwitter method, firstly we create an object of TwitterLogin whose constructor required parameters are apiKey, apiSecret and redirectURI, for now, they are empty because we haven't created our app in the Twitter developer console. Calling the method to log in, we use the authResult which is checked against various enums that come with the TwitterLogin package. On successful login, we create a firebase user using credentials from the Twitter login session.
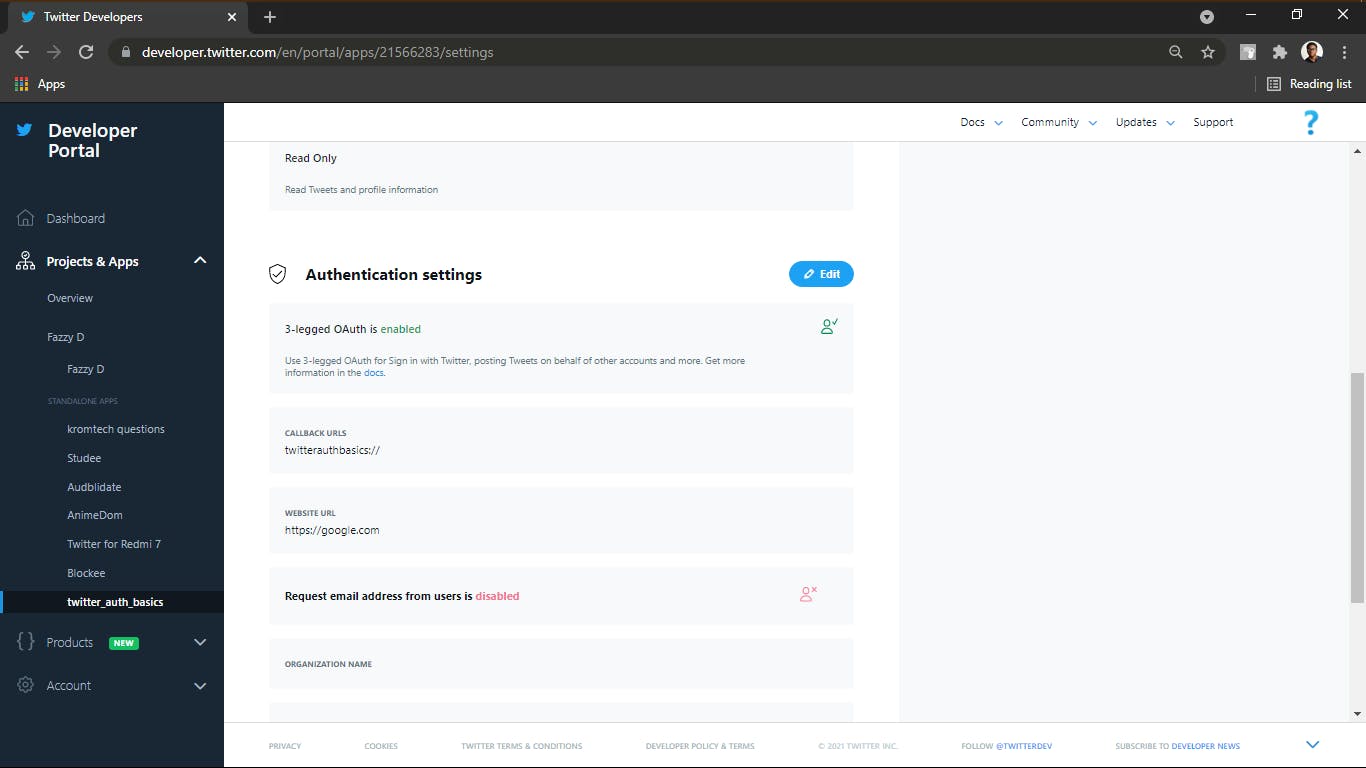
To create the Twitter app needed to sign in we'll head over to developer.twitter.com, to be able to create an app make sure your developer account is verified. We'll create an app for this project which we'll name twitter_auth_basics, on creation we get the API key and API secret which are the values for the parameters of the Twitter login constructor we called in our flutter app. Under settings for the app, we find the option for enabling three-legged auth which we need to perform authentications. On activation we see the required parameter to be filled is the callback URL, to sort this we head to the Twitter login package documentation which you'll find here. For the callback URL, we're required to create a scheme and it is recommended to use the name of our app, so we'll call our scheme "twitterAuthBasics://" which would be our callback URL, add "google.com" to our website URL because it is required and it doesn’t disrupt us from performing authentication. Adding these to the app, our Twitter settings look like this.

After adding our intent which the plugin would require, our androidmanifest.xml looks like this.
<application
        android:name="io.flutter.app.FlutterApplication"
        android:label="twitter_auth_basics"
        android:icon="@mipmap/ic_launcher">
        <activity
            android:name=".MainActivity"
            android:launchMode="singleTop"
            android:theme="@style/LaunchTheme"
            android:configChanges="orientation|keyboardHidden|keyboard|screenSize|smallestScreenSize|locale|layoutDirection|fontScale|screenLayout|density|uiMode"
            android:hardwareAccelerated="true"
            android:windowSoftInputMode="adjustResize">
            <meta-data
              android:name="io.flutter.embedding.android.NormalTheme"
              android:resource="@style/NormalTheme"
              />
            <meta-data
              android:name="io.flutter.embedding.android.SplashScreenDrawable"
              android:resource="@drawable/launch_background"
              />
            <intent-filter>
                <action android:name="android.intent.action.MAIN"/>
                <category android:name="android.intent.category.LAUNCHER"/>
            </intent-filter>
            <intent-filter>
                <action android:name="android.intent.action.VIEW" />
                <category android:name="android.intent.category.DEFAULT" />
                <category android:name="android.intent.category.BROWSABLE" />
                <data android:scheme="twitterauthbasics" /> <!-- host is option -->
            </intent-filter>
        </activity>
        <meta-data
            android:name="flutterEmbedding"
            android:value="2" />
    </application>
and our auth.dart looks like this
abstract class AuthBase {
  User get currentUser;
  Stream<User> get authStateChanges;
  Future<User> signInWithTwitter();
  Future<void> signOut();
}

class Auth implements AuthBase {
  final _firebaseAuth = FirebaseAuth.instance;

  @override
  Stream<User> get authStateChanges => _firebaseAuth.authStateChanges();

  @override
  User get currentUser => _firebaseAuth.currentUser;

  @override
  Future<User> signInWithTwitter() async {
    final twitterLogin = TwitterLogin(
      apiKey: "fbgtRycxfKKjDL3x2wnqgM4t1",
      apiSecretKey: "HrOa7qVTtxOTLihcNAx6K84On09HxfVaCzcMlc8xvnFGLS1Zi2",
      redirectURI: "twitterauthbasics://",
    );
    final authResult = await twitterLogin.login();
    switch (authResult.status) {
      case TwitterLoginStatus.loggedIn:
        final userCredential = await _firebaseAuth.signInWithCredential(
          TwitterAuthProvider.credential(
              accessToken: authResult.authToken,
              secret: authResult.authTokenSecret),
        );
        return userCredential.user;
      case TwitterLoginStatus.cancelledByUser:
        throw FirebaseAuthException(
          code: 'ERROR_ABORTED_BY_USER',
          message: authResult.errorMessage,
        );
        break;
      case TwitterLoginStatus.error:
        throw FirebaseAuthException(
          code: 'ERROR_TWITTER_LOGIN_FAILED',
          message: authResult.errorMessage,
        );
        break;
      default:
        throw UnimplementedError();
    }
  }

  @override
  Future<void> signOut() async {
    await _firebaseAuth.signOut();
  }
}
When building such apps, we want the user object to be available for whatever operations we might want to perform, such as saving data to the firestore, crashlytics, etc. To achieve this we make use of the provider package which allows us to get the provided value from any child or sub child of the parent widget(that is the provider), so for our app, we'll be plugging it into the very top of the widget tree, that is above the material app widget since we're using firebase, we initialize it before the app starts which would be done in our main() function, it's an asynchronous call which means we would have to make our main function async and the await the initialization. After implementing this our main.dart should look like this
Future<void> main() async {
  WidgetsFlutterBinding.ensureInitialized();
  await Firebase.initializeApp();
  runApp(MyApp());
}

class MyApp extends StatelessWidget {
  @override
  Widget build(BuildContext context) {
    return Provider<AuthBase>(
      create: (context) => Auth(),
      child: MaterialApp(
        title: 'Twitter Authentication',
        theme: ThemeData(
          primarySwatch: Colors.blue,
          visualDensity: VisualDensity.adaptivePlatformDensity,
        ),
        home: SignInPage(),
      ),
    );
  }
}
The first line of the main method, widgetflutterbinding acts as the glue between the widgets and the frameworks, go here to read more on it.
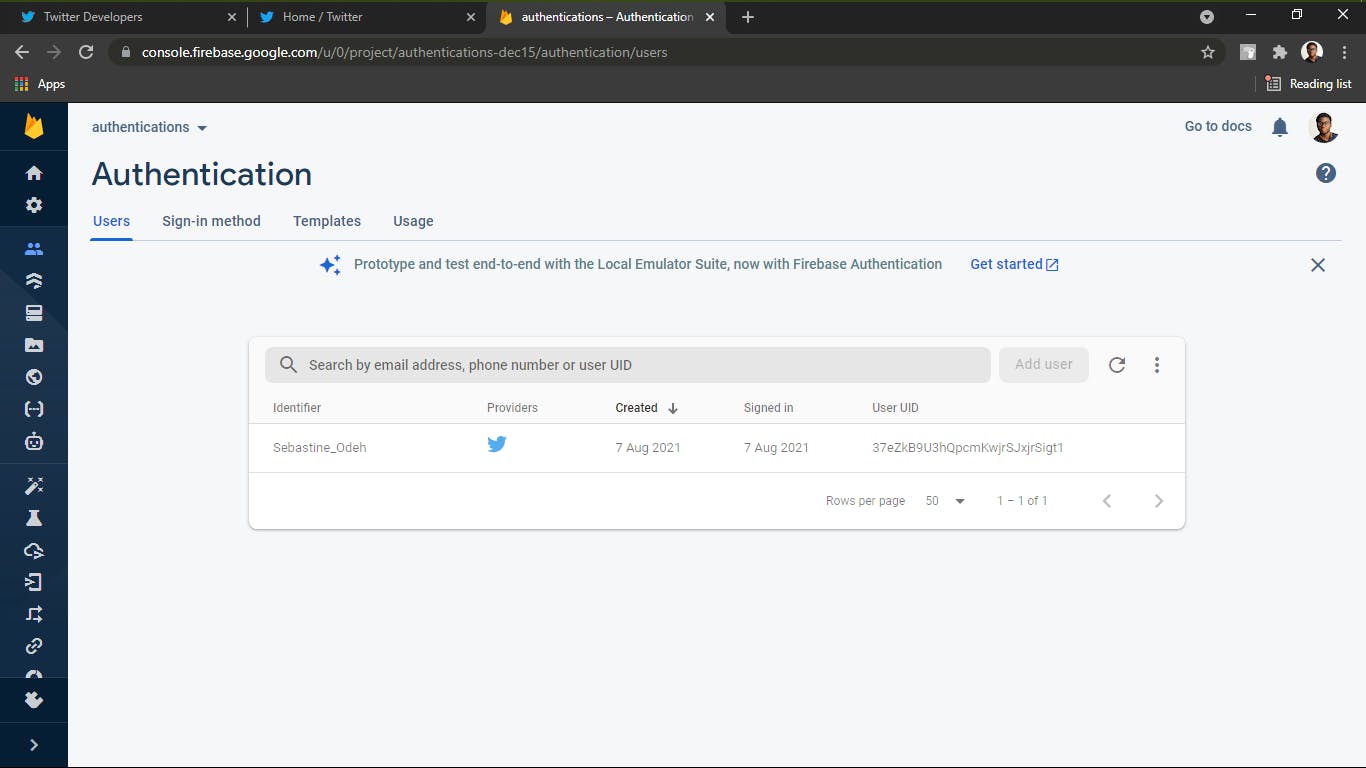
At this point I expect the reader to have registered their app on firebase, you can go here (firebase.flutter.dev/docs/overview) if you need help setting it up. After setting the project up and configuring the app with the required JSON file, go to your firebase console and enable twitter authentication. To enable twitter authentication we'll need our API key and API secret.
Now we update our SignInPage to show when the user info like displayName and email while signed in and only the sign in button while signed out. Our SignIn page file now looks like this.
class SignInPage extends StatefulWidget {
  @override
  _SignInPageState createState() => _SignInPageState();
}

class _SignInPageState extends State<SignInPage> {
  @override
  Widget build(BuildContext context) {
    final auth = Provider.of<AuthBase>(context);
    return StreamBuilder<User>(
      stream: auth.authStateChanges,
      builder: (context, snapshot) {
        if (snapshot.data != null) {
          User user = snapshot.data;
          return Scaffold(
            appBar: AppBar(
              title: Text("Home Page"),
              centerTitle: true,
            ),
            body: Column(
              mainAxisAlignment: MainAxisAlignment.center,
              crossAxisAlignment: CrossAxisAlignment.center,
              children: [
                Text('Display Name: ${user.displayName}'),
                Text('User email: ${user.email}'),
                SizedBox(
                  height: 12,
                ),
                RaisedButton(
                  color: Colors.blueAccent,
                  child: Text('Sign Out'),
                  onPressed: () async {
                    await auth.signOut();
                    setState(() {});
                  },
                ),
              ],
            ),
          );
        }
        return Scaffold(
          appBar: AppBar(
            title: Text('Twitter Auth Basics'),
          ),
          body: Center(
            child: RaisedButton(
              color: Colors.blueAccent,
              disabledColor: Colors.blueAccent,
              elevation: 8,
              onPressed: () async {
                await auth.signInWithTwitter();
                setState(() {});
              },
              child: Text(
                'Sign-in with Twitter',
                style: TextStyle(
                  color: Colors.white,
                ),
              ),
            ),
          ),
        );
      },
    );
  }
}
Here are screenshots of the app and our firebase console before and after a user signs in with Twitter authentication.


Conclusion
In this article, we've learnt to implement twitter authentication with firebase using the twitter_login package. You can find the code here. Hopefully, you find this a good guide, for more on the Twitter login plugin visit https://pub.dev/packages/twitter_login. See you next time and don't forget to give a clap and feedback🤗🤗.
